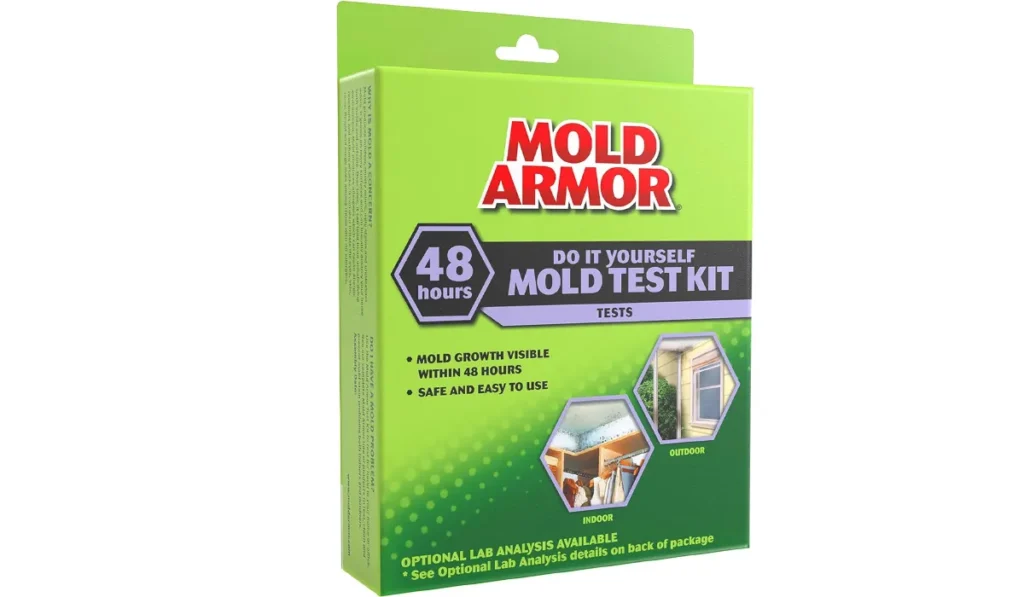
To use the Mold Armor Test Kit, first collect a sample with the provided swabs. Then, mix it with the test solution in the petri dish. Allow the dish to incubate for the recommended time, and observe any mold growth. Compare results with the included chart to assess.
Understanding the Mold Armor Test Kit

What is the Mold Armor Test Kit?
The Mold Armor Test Kit is a user-friendly toolkit designed to detect the presence of mold in your home.
Mold can pose significant health risks, especially to those with allergies or compromised immune systems. This test kit allows homeowners to take the first step in identifying and addressing mold-related issues.
Components of the Kit
The kit includes everything necessary for a complete mold detection process. Inside, you’ll find swabs for sample collection, a petri dish for cultivating mold, a test solution that reacts with the mold, and a chart for interpreting results.
The comprehensive instructions provide guidance on how to use each component effectively.
Types of Molds the Kit Can Detect
Mold comes in various types, and the Mold Armor Test Kit is capable of detecting a wide range of common household molds.
These include but are not limited to, black mold (Stachybotrys), Aspergillus, and Penicillium. Knowing the type of mold can help in understanding the potential risks and determining the appropriate remediation strategies.
Importance of Mold Detection and Safety Considerations
Detecting mold is crucial because it can cause health problems and structural damage to your home if left unchecked.
The Mold Armor Test Kit provides a proactive approach to mold detection, ensuring that you can address the problem before it escalates. It is also important to follow safety guidelines when testing for mold, as exposure can be harmful.
Preparing for the Mold Test

Selecting the Appropriate Area for Testing
Choosing the right test location is essential. Look for areas where mold is likely to grow, such as damp or water-damaged spots, basements, bathrooms, and areas with poor ventilation. Make sure the area is accessible and safe to approach for sampling.
Cleaning the Area Before Testing
Before using the Mold Armor Test Kit, clean the area gently to remove any dust or debris that could interfere with the results.
Avoid using harsh chemicals or cleaners that might kill mold spores, as this could lead to inaccurate test outcomes.
Safety Measures to Take During Testing
Always wear protective gloves and a mask to prevent direct contact with mold. Ensure the room is well-ventilated during the testing process to minimize inhalation of any airborne spores.
Reading and Understanding the Instructions
Before beginning the test, read through the provided instructions thoroughly. Understanding each step will help ensure accurate results and prevent any potential safety issues during the testing process.
Conducting the Test and Interpreting Results

Step-by-Step Guide to Using the Mold Armor Test Kit
Start by putting on your gloves and mask. Open the kit and take out the swab. Rub the swab over the area you suspect has mold to collect a sample.
Next, open the petri dish and place the swab inside. Pour the test solution over the swab, ensuring it mixes well. Seal the petri dish as instructed and label it if testing multiple areas.
How to Collect Mold Samples?
When collecting mold samples, be thorough but gentle to avoid releasing excess spores into the air.
Target visible mold growth or areas with a musty smell. If you’re testing the air, let the petri dish sit open in the chosen area for an hour before sealing it.
Waiting Period and What to Do During This Time
After collecting the samples, place the petri dish in a warm, dark place for the incubation period, which typically lasts 48 to 72 hours.
During this time, avoid disturbing the dish to allow for accurate cultivation of any mold spores present.
How to Interpret the Results of the Test?
Once the waiting period is over, observe any mold growth within the petri dish. Use the included chart to compare the mold growth patterns and coloration to help identify the type of mold.
If mold is present, the chart will assist in determining the severity of the infestation based on the size and density of the growth.
Next Steps Based on the Outcome of the Test
If the test indicates mold growth, it is advisable to take immediate action. For small areas of mold, you can clean them with a mold-killing solution.
In cases of extensive mold growth, you might need to seek professional remediation services. Regardless of the test outcome, improving ventilation and addressing moisture issues are key to preventing future mold problems.
FAQs About Using Mold Armor Test Kit
How do I collect a mold sample using the Mold Armor Test Kit?
Use the provided swabs to collect a sample from the area you suspect has mold growth.
What is the next step after collecting a mold sample with the Mold Armor Test Kit?
Mix the collected sample with the test solution in the petri dish as instructed in the kit’s manual.
How long should I allow the petri dish to incubate?
Allow the dish to incubate for the time recommended in the Mold Armor Test Kit’s instructions, typically 48 to 72 hours.
What should I do after the incubation period?
Observe the petri dish for any mold growth. If there is growth, it will be visible in the dish.
How do I interpret the results from the Mold Armor Test Kit?
Compare any observed mold growth with the included chart in the kit to assess the level of mold present.
Final Thoughts
The Mold Armor Test Kit is user-friendly; simply collect a sample with the swabs, mix with the solution in the provided dish, and allow it to incubate.
After the recommended period, observe for mold growth and use the chart to evaluate the results. This straightforward process assists in identifying mold presence in any environment.
